Zen Cart is a PHP e-commerce shopping cart program. You can start your online store very easily. Easy to install and easy to configure Zen Cart online application. Just a few clicks then install Zen Cart your web hosting.
- Download Zen Cart offline installer.
- Upload the Zen Cart zip file on your server.
- Extract the Zen Cart zip file.
- Enter the Extract folder.
- Move all file public_html folder.
Step by Step Install Zen Cart
Step 1. Open a new tab in your browser. Write your domain name and press enter. Zen Cart installation window appears.
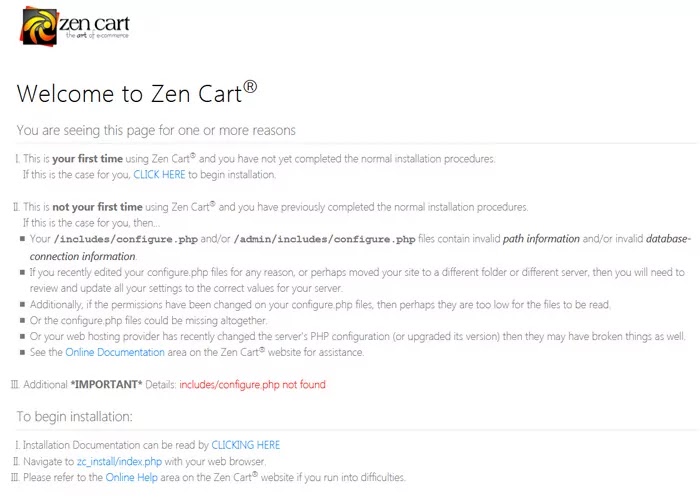
Step 2. Normal installation press CLICK HERE.

Step 3. After clicking the system inspection window appears. Then click Continue.

Step 4. Next system setup window. Check the box license terms and don’t change any option. Then click Continue.

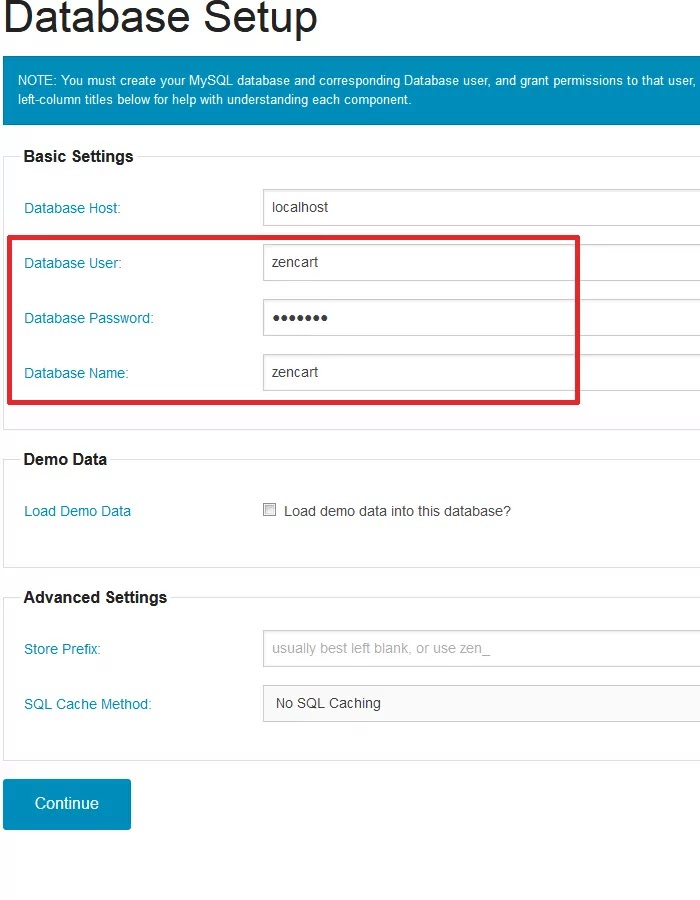
Step 5. It is a database setup page. Create a MySql database and change database user, password, and database name. Don’t change any other option.
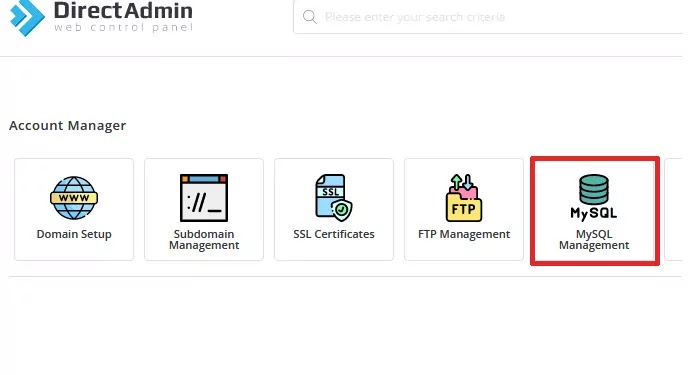
Step 6. Open cPanel or Direct admin panel. Click MySql Management.
Step 7. Click Create New Database.

Step 8. Write the database name. We use Zencart. Same as database username. Write this password very strong minimum of 12 letters. Then click the create database button. Your database created successfully.

Step 9. Same input database user, name, and password in those fields. Please following the number. Then click Continue.

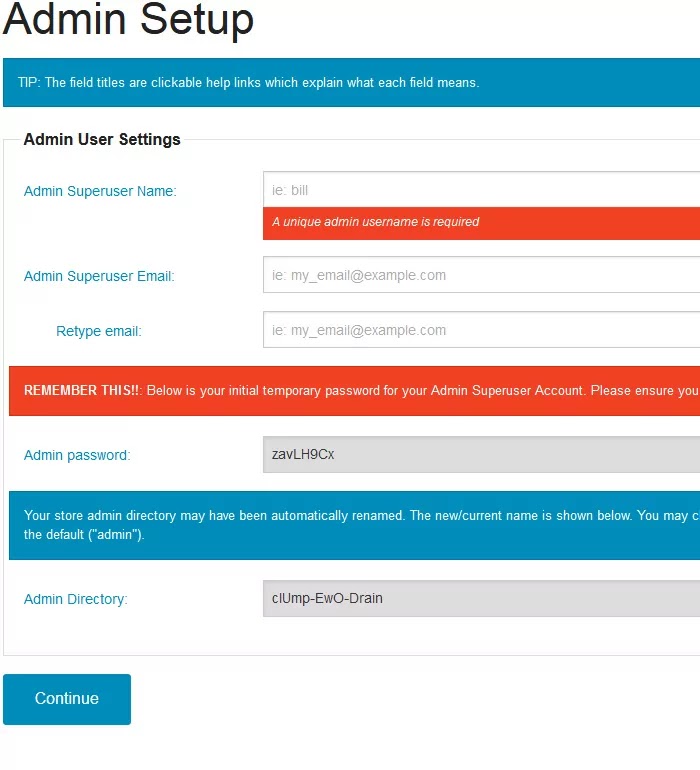
Step 10. Write admin superuser name, email, and retype email. You can put a valid email id. Then click Continue.
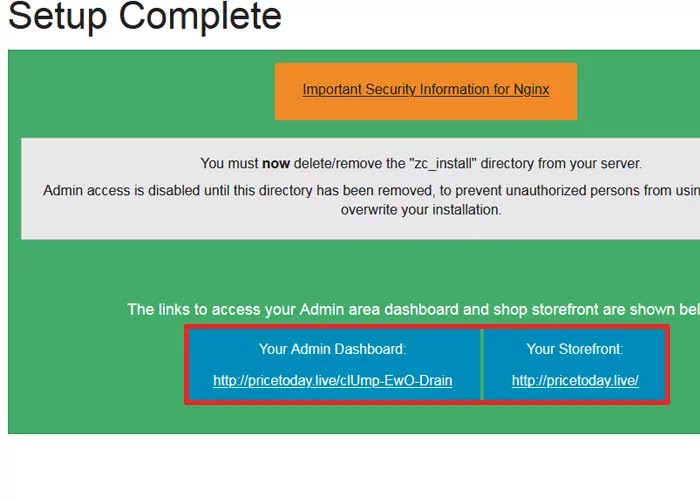
Step 11. Zen Cart installs successfully. You must delete the zc_install directory. Showing two links. The first link is the admin dashboard link and the second link is the storefront.
How to Auto Install Zen Cart
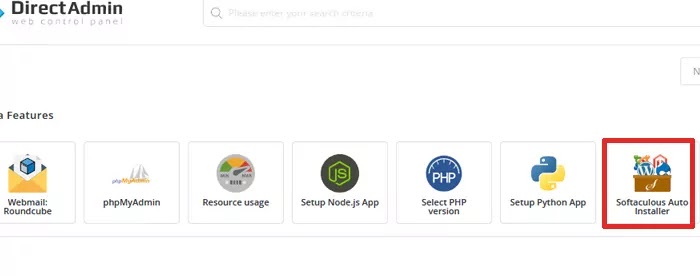
Step 1. Go to the direct admin panel. Then click Softaculous Auto Installer.
Step 2. Click the Zen Cart install now button.

Step 3. Choose the installation URL.
- Select the HTTP protocol. Don’t choose the HTTPS protocol.
- Choose your domain. Where you will install.
- If you do not want to install in a folder, leave the Directory option blank. If not, write the name of the directory.
- Don’t click quick install.

Step 4. This is the admin account section. You can change the admin username if you want. Put the password very strong. Write this password very strong minimum of 12 letters. Write the admin email id. You can write any type of email id. Then click the install button.

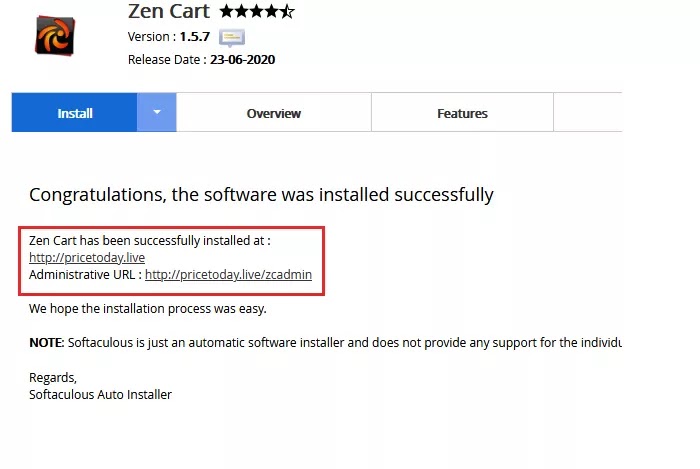
Step 5. Zen Cart installed successfully. You see two URLs. The first URL is the Zen Cart installation URL and the second URL is the Zen Cart admin dashboard URL. Then logout Softaculous Auto Installer panel.
Server Requirement
- Disk Space: 10 GB or more is better
- PHP Compatibility − PHP 7.2 or high
- Bandwidth: 100 GB or more is better
- MySql Databases: 5.0 or more is better
Server configuration is the most important when you are using the Zen Cart eCommerce application. Zen Cart is very lightweight but server speed is very important for loading your Zen Cart website. You will choose mostly high RAM and high processor. Shared hosting is not good for the eCommerce website.